If you just joined Reel, welcome. This Reel captain onboarding guide is your fast, practical walkthrough for getting started on Reel: setting up your captain profile, adding vessel details, uploading documents, and preparing to accept bookings with confidence.
Our goal is simple: help professional U.S. charter captains reduce admin work, set clearer expectations, and attract better-fit customers—without turning you into a full-time marketer.
Quick takeaways
- Your profile sets expectations and reduces time-wasting questions.
- Vessel details build trust and help customers choose the right trip.
- Document uploads protect everyone and help keep the platform professional.
- Small improvements compound: clearer listings lead to smoother bookings and fewer disputes.
Table of contents
- Reel captain onboarding checklist (10-minute setup)
- Step 1: Complete your captain profile
- Step 2: Add your vessel details
- Step 3: Upload required documents
- Step 4: Set policies and expectations
- Step 5: Prepare to accept bookings
- Common onboarding mistakes (and quick fixes)
- FAQ
Reel captain onboarding checklist (10-minute setup)
If you only have a few minutes, use this checklist to get your profile “booking-ready” fast:
- Captain profile: clear headline + intro, what’s included, what to bring
- Vessel: capacity, key amenities, clear photos, meeting location
- Documents: upload license/registration/insurance if requested
- Policies: weather, cancellations, arrival timing
- Final scan: does a first-time customer understand the trip in 60 seconds?
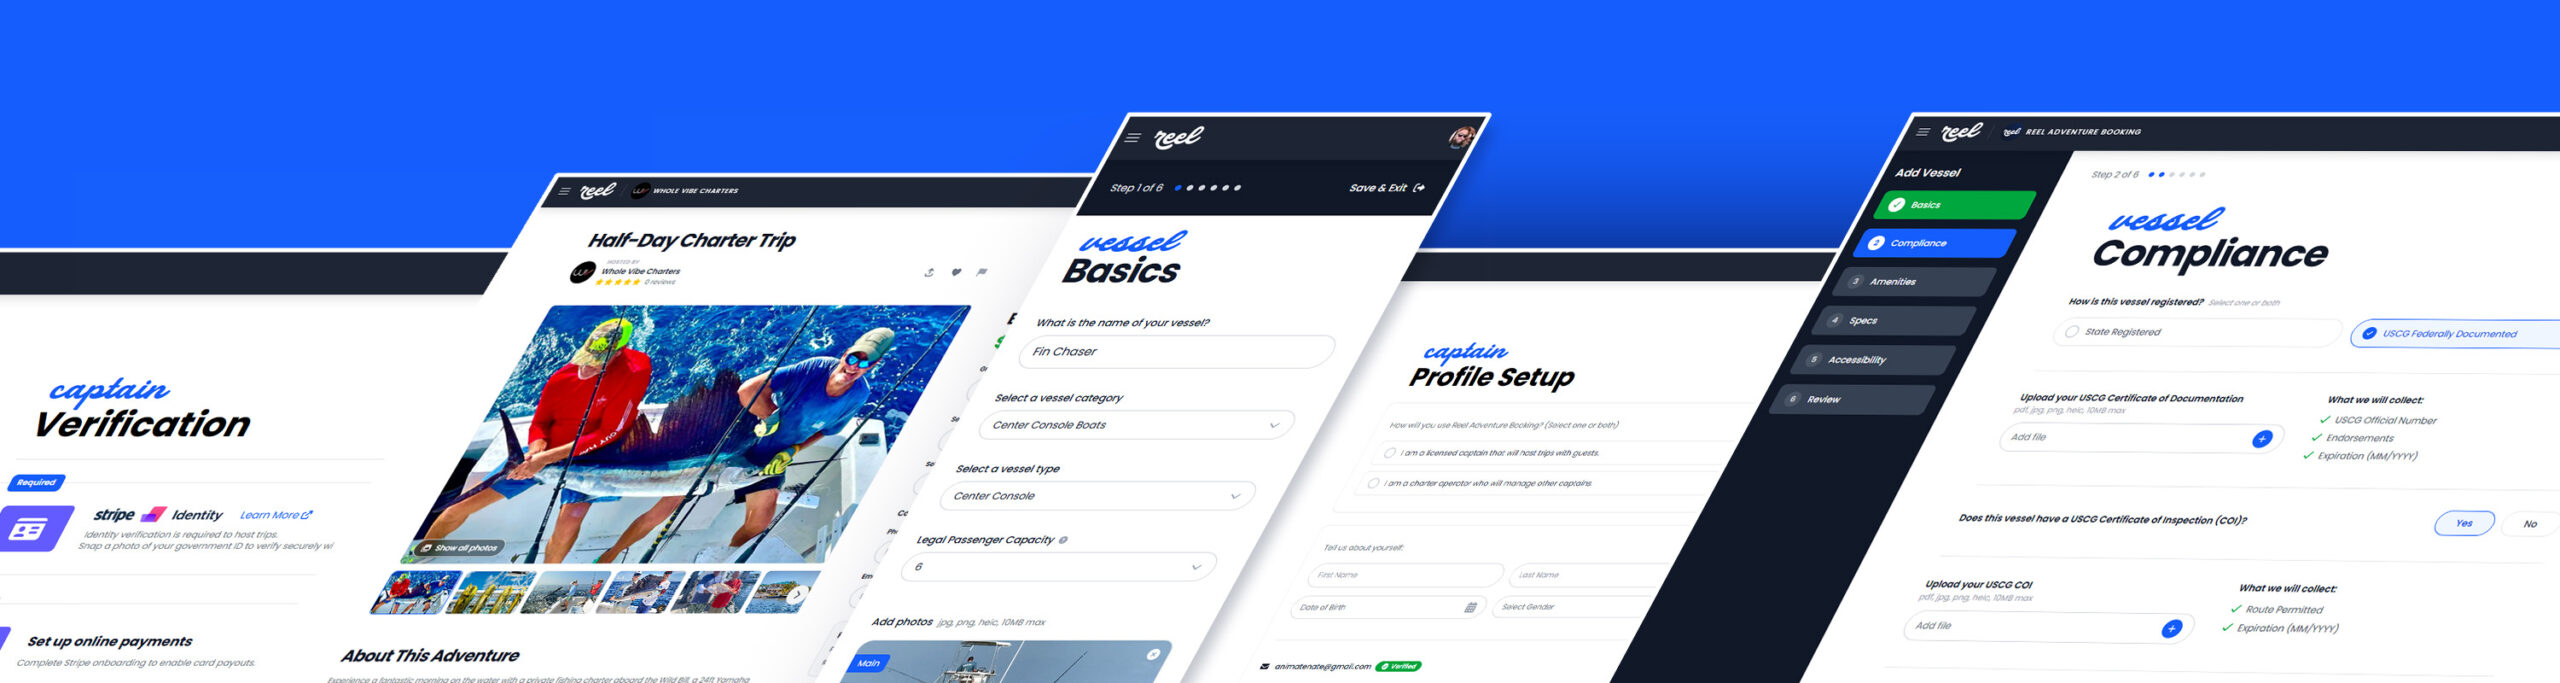
Step 1: Complete your captain profile
Your profile is your “trust page.” In 60 seconds, a customer should understand:
- Who you are (experience, style, what you specialize in)
- What kind of trips you run (family-friendly, beginner-friendly, hardcore offshore, etc.)
- How you operate (communication, safety-first decisions, what’s included)
Profile checklist (high impact)
- Headline: say what you do in plain language (e.g., “Family-friendly inshore & nearshore charters”)
- Short intro: who your trips are best for
- What’s included: rods/reels, bait, tackle, ice, fish cleaning (if applicable)
- What guests should bring: sunscreen, food/drinks, motion meds, licenses (if required)
- Meeting details: where to meet, when to arrive, parking notes
Pro tip: Write like you’re explaining it to a first-time charter customer. Avoid jargon unless you define it.
Step 2: Add your vessel details
Your vessel details help customers self-select into the right trip and reduce last-minute surprises. Great vessel listings answer:
- Capacity: how many guests (and what’s comfortable)
- What the boat is best for: inshore, offshore, family trips, fly, etc.
- Amenities: shade, restroom/head, livewell, fishfinder, safety gear (as applicable)
- Safety expectations: what you provide and what you recommend guests bring
Vessel checklist
- Accurate passenger limit and a clear note if kids are welcome
- Clear photos (deck layout, seating, helm, any key amenities)
- Meeting location clarity (marina name + what guests should look for)
Photos that build trust (simple rules)
- At least 1 wide photo that shows the deck layout (helps customers visualize the trip)
- At least 1 “comfort” photo (shade, seating, head/restroom if applicable)
- A clear meeting point cue (marina sign, dock gate, or “look for the blue hull” note)
Step 3: Upload required documents
Document uploads protect captains and customers. They’re also part of maintaining a platform that highlights legitimate operators.
Depending on your operation and location, you may be asked to upload items like:
- Captain credentials (license/MMC as applicable)
- Vessel registration (state registration or USCG documentation)
- Insurance (proof of coverage)
For background on U.S. licensing standards, see: USCG Merchant Mariner Credential.
Step 4: Set policies and expectations
Most booking problems come from unclear expectations. The fastest way to protect your reputation is to make policies visible before a customer books.
Policies to define clearly
- Weather policy: who makes the call, how far in advance, reschedule vs refund expectations
- Cancellation policy: deposits, notice windows, no-shows
- Arrival policy: how early to arrive and what happens if someone is late
Clear policies don’t reduce bookings—they reduce bad-fit bookings and protect good captains.
What guests should know before they book
When you spell out the basics up front, you get fewer “time sink” messages and more confident bookings:
- Trip fit: who it’s best for (beginners/families/experienced anglers)
- Included vs bring: eliminate last-minute surprises
- Timing: arrive time, run time, return window
- Fish expectations: focus on experience and opportunity, not guarantees
Step 5: Prepare to accept bookings
Before you turn on the “accept bookings” switch, do a quick final check:
- Profile complete (who you are, what you run, what’s included)
- Vessel complete (capacity, amenities, photos, meeting location)
- Documents uploaded (license/registration/insurance as requested)
- Policies set (weather/cancel/arrival)
Need help? A short call can save hours later. Schedule a session here: Book a 30-minute session.
Ready to finish setup? Start here: Captain start.
Helpful resources:
- Charter Captain Resources (internal)
- Why Reel Exists: A Better Platform for U.S. Charter Captains (internal)
- Fishing Charter Captains: Next Steps After You Sign Up (internal)
Common onboarding mistakes (and quick fixes)
1) Vague trip descriptions
Fix: Add a one-line “trip promise” (who it’s for + what success looks like) and list what’s included.
2) Missing meeting details
Fix: Add a clear arrival time and a “look for” instruction (dock name, marina sign, boat color).
3) Policies that live only in your head
Fix: Write your weather/cancellation/arrival policies in plain language so customers understand before they book.
FAQ
How long does onboarding take?
Most captains can complete the basics quickly. The fastest path is to start with profile + vessel details, then upload documents once you have them handy.
Do I have to change how I run trips?
No. Reel is meant to support real-world operations. Clear expectations and better communication simply reduce friction and help you attract better-fit customers.
What’s the #1 thing that improves bookings?
Clarity. Strong photos, a clear trip promise, and visible policies build trust and reduce hesitation.
What focus keyword should I use in Rank Math?
Use Reel captain onboarding as your primary focus keyword for this post, and make sure it appears in the title, URL, intro, and at least one heading.

